Classroom Training
LLVM 8.5
Virtual Machine Guide

© 2020 Pegasystems 1
Classroom Training
Virtual Machine Guide
© Copyright 2020
Pegasystems Inc. Cambridge, MA
All rights reserved.
Trademarks
For Pegasystems Inc. trademarks and registered trademarks, all rights reserved. Other brand or product names are trademarks
of their respective holders.
For information about the third-party software that is delivered with the product, refer to the third-party license file on your
installation media that is specific to your release.
Notices
This publication describes and/or represents products and services of Pegasystems Inc. It may contain trade secrets and
proprietary information that are protected by various federal, state, and international laws, and distributed under licenses
restricting their use, copying, modification, distribution, or transmittal in any form without prior written authorization of
Pegasystems Inc.
This publication is current as of the date of publication only. Changes to the publication may be made from time to time at the
discretion of Pegasystems Inc. This publication remains the property of Pegasystems Inc. and must be returned to it upon
request. This publication does not imply any commitment to offer or deliver the products or services described herein.
This publication may include references to Pegasystems Inc. product features that have not been licensed by you or your
company. If you have questions about whether a particular capability is included in your installation, please consult your
Pegasystems Inc. services consultant.
Although Pegasystems Inc. strives for accuracy in its publications, any publication may contain inaccuracies or typographical
errors, as well as technical inaccuracies. Pegasystems Inc. may make improvements and/or changes to the publication at any
time.
Any references in this publication to non-Pegasystems websites are provided for convenience only and do not serve as an
endorsement of these websites. The materials at these websites are not part of the material for Pegasystems products, and use
of those websites is at your own risk.
Information concerning non-Pegasystems products was obtained from the suppliers of those products, their publications, or
other publicly available sources. Address questions about non-Pegasystems products to the suppliers of those products.
This publication may contain examples used in daily business operations that include the names of people, companies, products,
and other third-party publications. Such examples are fictitious and any similarity to the names or other data used by an actual
business enterprise or individual is coincidental.
This document is the property of:
Pegasystems Inc.
One Rogers Street
Cambridge, MA 02142-1209
USA
Phone: 617-374-9600 Fax: (617) 374-9620
www.pega.com
DOCUMENT: VM User Guide
SOFTWARE VERSION: Pega 8
UPDATED: 09 25 2020

© 2020 Pegasystems 2
Classroom Training
Virtual Machine Guide
Contents
Introduction ....................................................................................................................................... 3
Virtual Machine archives ............................................................................................................... 3
System Requirements ....................................................................................................................... 4
Hardware ........................................................................................................................................ 4
Operating Systems (64-bit only) ................................................................................................... 4
Virtualization software .................................................................................................................. 4
Installing virtualization software ...................................................................................................... 5
Running your Virtual Machine .......................................................................................................... 6
Virtual Box ...................................................................................................................................... 6
Importing the VM ....................................................................................................................... 6
Starting the VM ........................................................................................................................... 7
VMware Workstation Player ......................................................................................................... 9
Importing the VM ....................................................................................................................... 9
Starting the VM ......................................................................................................................... 10
VMware Fusion ............................................................................................................................ 12
Starting the VM ......................................................................................................................... 13
Linux Lite Applications .................................................................................................................... 14
Bookmarks ................................................................................................................................... 14
Home Page ............................................................................................................................... 15
Shutting Down the VM .................................................................................................................... 16
VirtualBox ..................................................................................................................................... 16
VMware Workstation Player ....................................................................................................... 16
VMware Fusion ............................................................................................................................ 16
Network Settings ............................................................................................................................. 17
Getting Help ..................................................................................................................................... 19
VBox .............................................................................................................................................. 19
VMWare Player ............................................................................................................................. 19
VMWare Fusion ............................................................................................................................ 19
© 2020 Pegasystems 3
Classroom Training
Virtual Machine Guide
Introduction
Many Pega classroom courses provide a virtual machine (VM) for you to download and use
on your computer to complete the exercises that accompany the course. This option is a
useful addition for those who wish to practice during and after a course, to hone their Pega
skills.
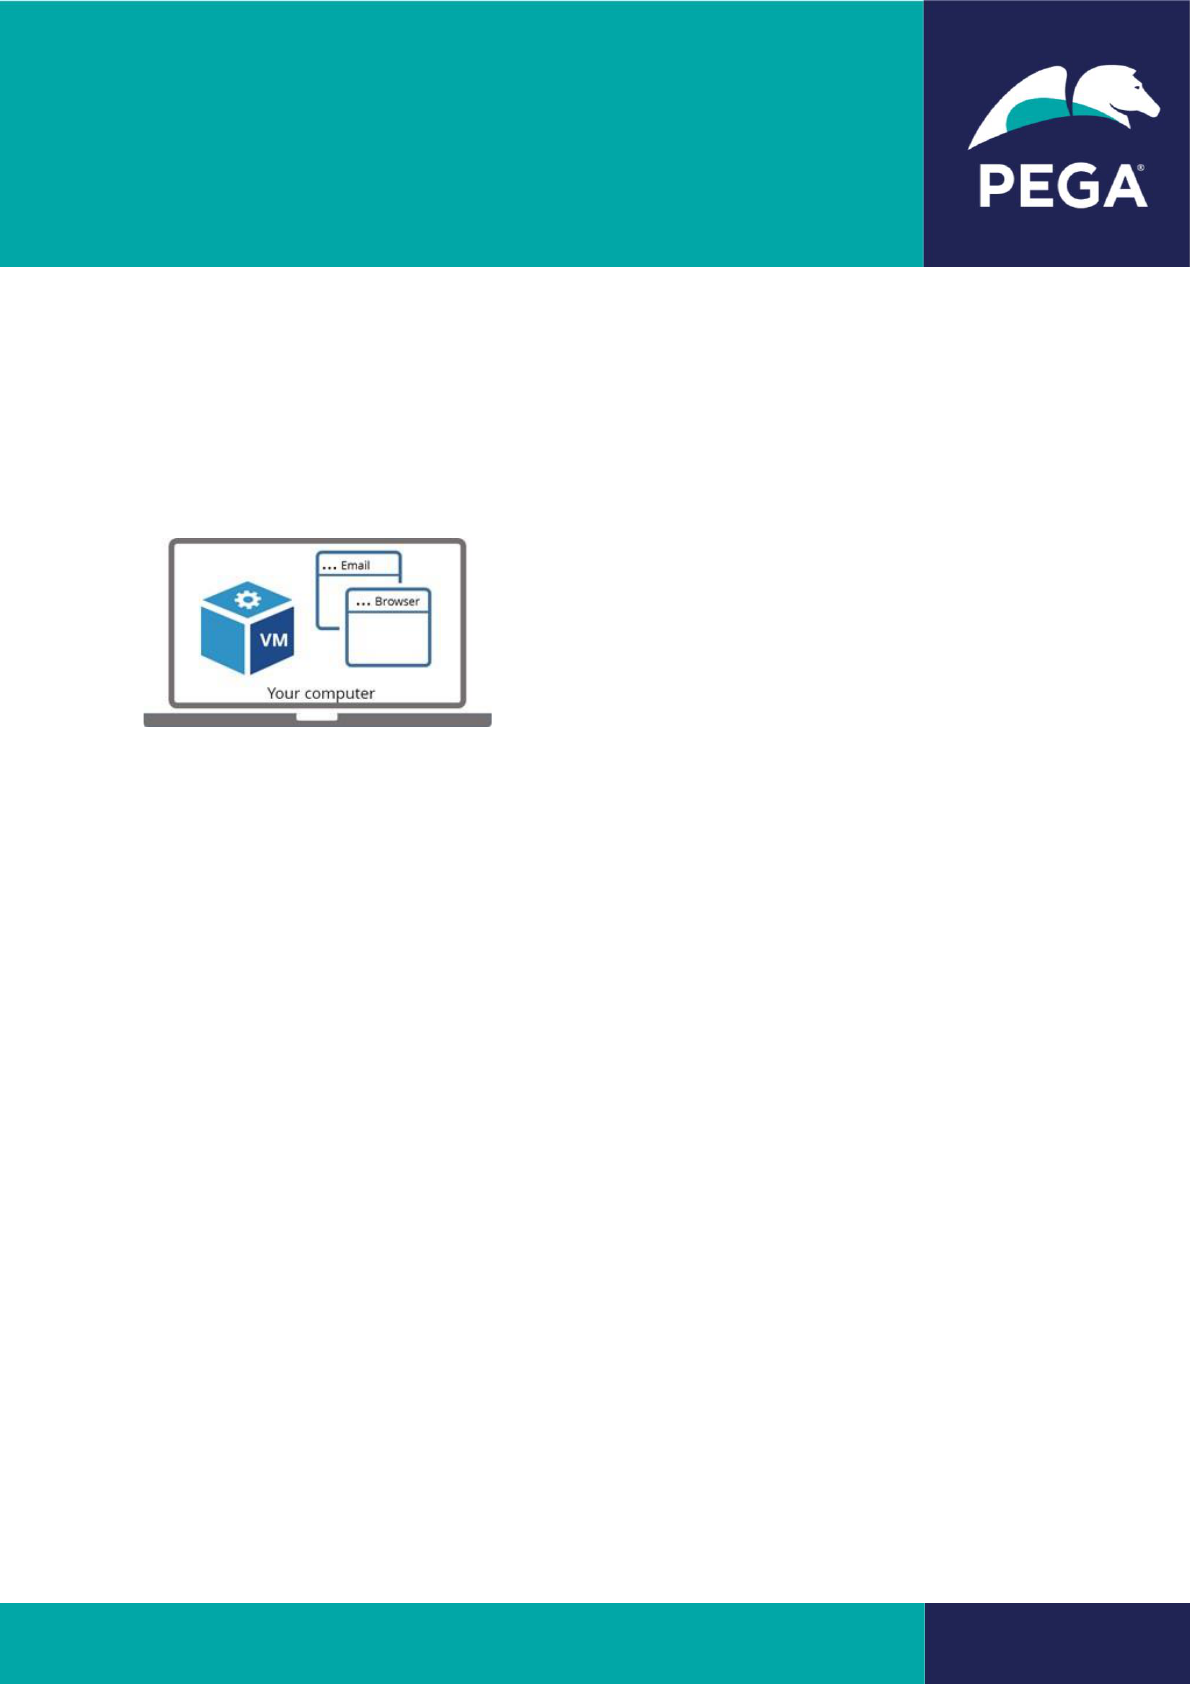
A VM is a program that allows you to run another
operating system on your computer by sharing its
hardware.
The virtual machine or ‘guest’ runs on your computer,
the ‘host’ just like any other software program.
The VM allows you to practice using Pega’s software
and solutions on Windows, macOS, or Linux without
having to install or configure the guest’s software; dB, web server, email client, Pega, etc.
The VM runs on your computer, under your control, making it an excellent environment for
learning how to build Pega applications on your own time, offline, and at your convenience.
Virtual Machine archives
The VM is made available as an industry-standard OVA (Open Virtualization Archive) file that
contains a compressed, installable version of a virtual machine. You use your virtualization
software program to open / import and extract the OVA file. Think of the OVA as being the
content and the virtualization software as the player that starts, stops, and manages the VM.
There are many benefits to running VMs, as well as those already mentioned.
• You can run as many as your host system’s hardware will support.
• You can keep a library of different versions at your fingertips
• You can take snapshots to easily ‘rewind and replay’ as you learn
• You can ‘expose’ the VM to the outside world, to access it from other PC’s if desired
• Our VMs include useful software in addition to Pega itself so that you can dig deeper
• You can install your own additional software to experiment and expand your learning

© 2020 Pegasystems 4
Classroom Training
Virtual Machine Guide
System Requirements
To use the VM effectively, you will need a PC that meets the following requirements:
Hardware
• 64-bit capable CPU, with virtualization, enabled in the BIOS
1
• Minimum 12 GB RAM free for the VM to use (in addition to that required by your host)
• At least 25 GB of free disk space
1
If your computer has a 64-bit capable CPU and you receive an error message when you try
to run the virtual machine that reads: This kernel requires an x86-64 CPU, but only
detected an i686 CPU, the BIOS setting for virtualization is most likely not enabled on your
computer, you must enable virtualization in the BIOS setting to continue. Perform a Google
search to find specific instructions for your computer.
Operating Systems (64-bit only)
• Microsoft Windows: 7, 8, 10
• Apple OSX macOS
Virtualization software
• Microsoft Windows: VirtualBox or VMware Workstation Player
• OS X or macOS: VirtualBox or VMware Fusion

© 2020 Pegasystems 5
Classroom Training
Virtual Machine Guide
Installing virtualization software
Virtualization software is used to emulate a complete computer system, allowing a guest
operating system to run on a host operating system.
Install the virtualization software of your choice. You can accept the default installation
options or customize the installation according to your preferences.
Pega VM’s have been tested and work with the following virtualization software:
• Virtual Box ( https://www.virtualbox.org/ )
VirtualBox is available as Open Source Software under the terms of the GNU General
Public License (GPL) version 2.
• VMWare ( https://my.vmware.com/en/web/vmware/downloads )
▪ Workstation Player (Windows only). Paid license required.
▪ Fusion (OS X and macOS only). Paid license required.
There are other virtualization tools you may use as well. As Pega saves
its VM images as OVA files, any software that supports the latest OVA
standards should be OK to use.
After installing the virtualization software of your choice, proceed to the appropriate section
in this document to learn how to import and run it.

© 2020 Pegasystems 6
Classroom Training
Virtual Machine Guide
Running your Virtual Machine
Virtual Box
Follow these steps to run the VM using VirtualBox.
Importing the VM
1. Launch VirtualBox
2. Click the Import icon
3. Click the Folder icon to select the OVA you wish to import.
4. Select the OVA you want to import into VirtualBox, and then click Open.
5. Click Next.
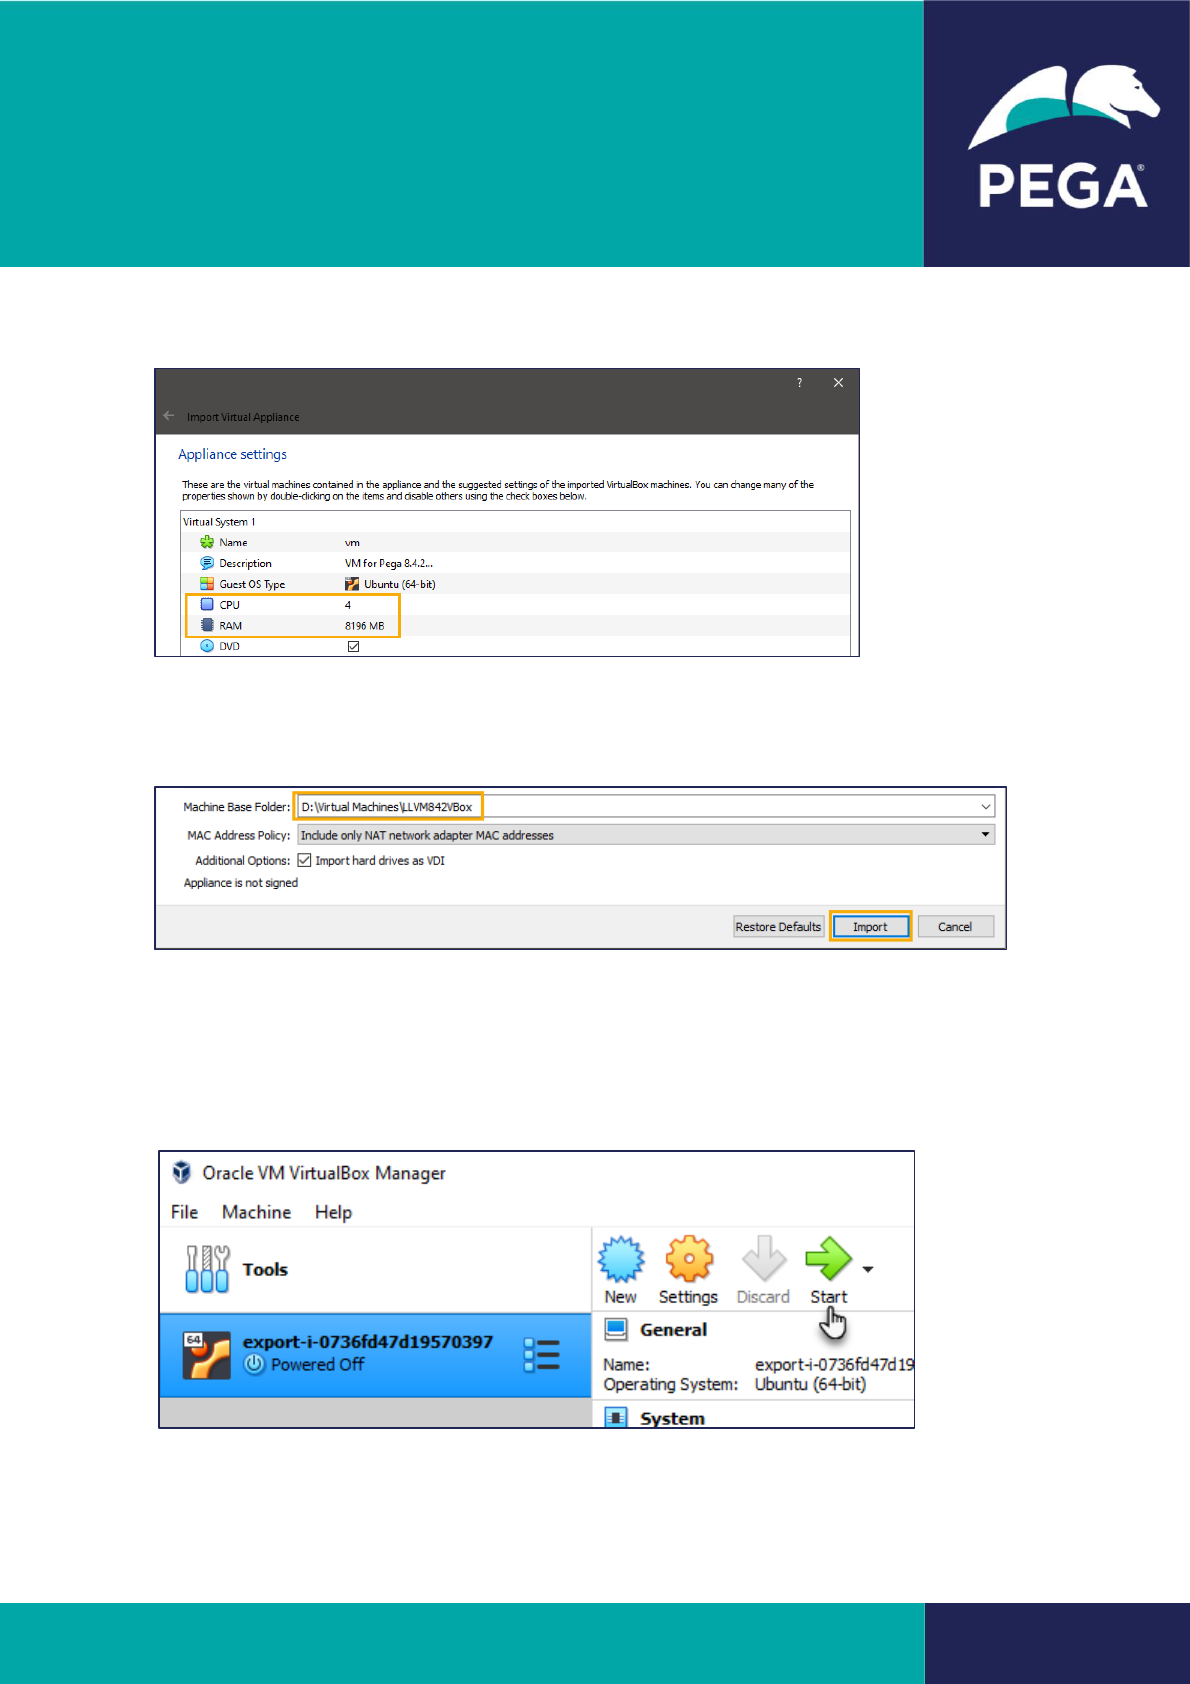
6. In the Appliance settings window, you can modify the CPU and RAM. You can configure
the maximum number of CPU your computer can support, and set the RAM to a
minimum value of 8192 MB.
The optimum student experience has been reported for the 8.5.1 and 8.5.2 images when the
settings are at 2 CPU and 16 GB RAM.
© 2020 Pegasystems 7
Classroom Training
Virtual Machine Guide
7. After modifying, the settings should look like this:
8. Choose an appropriate place on your system to store the files in (make sure there is
adequate space and choose a solid-state (SSD) drive if available as this will dramatically
improve performance).
9. Click Import to import the OVA.
Starting the VM
1. Make sure the VM is selected in the Library panel and click the Start icon.
© 2020 Pegasystems 8
Classroom Training
Virtual Machine Guide
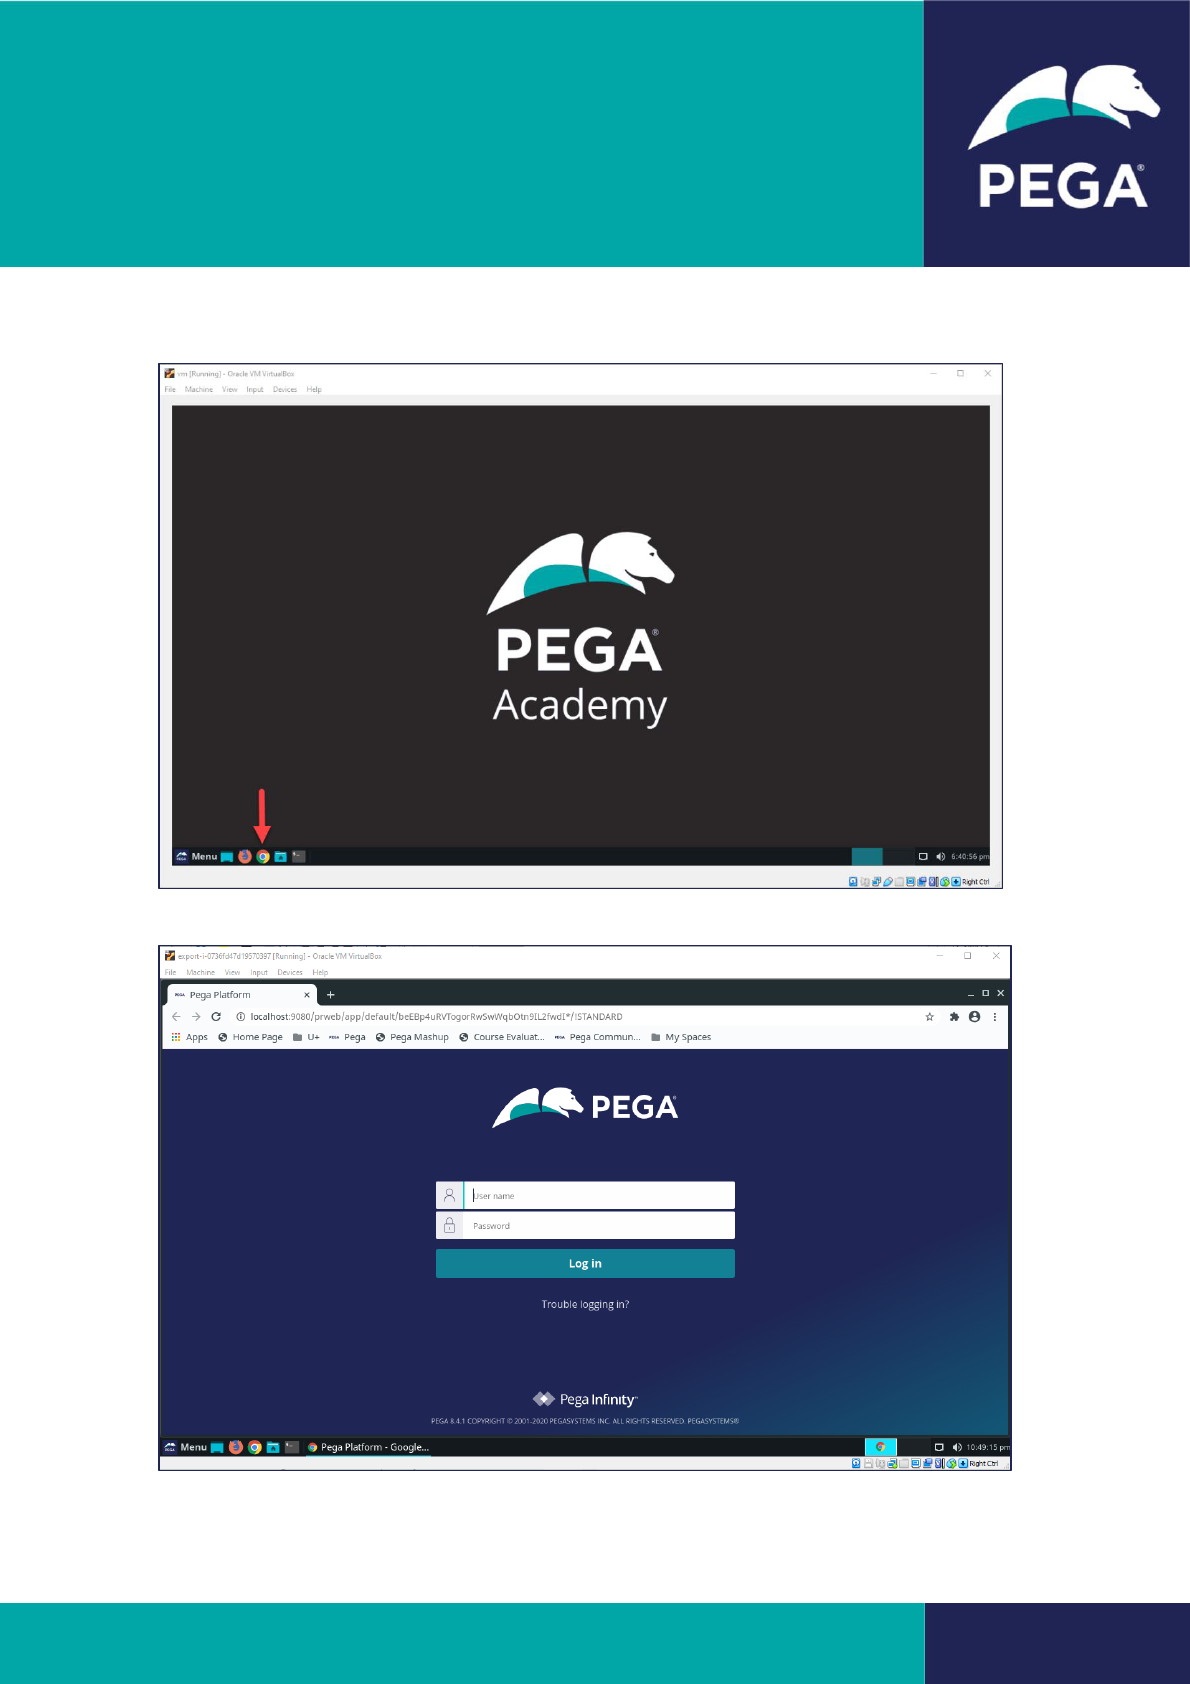
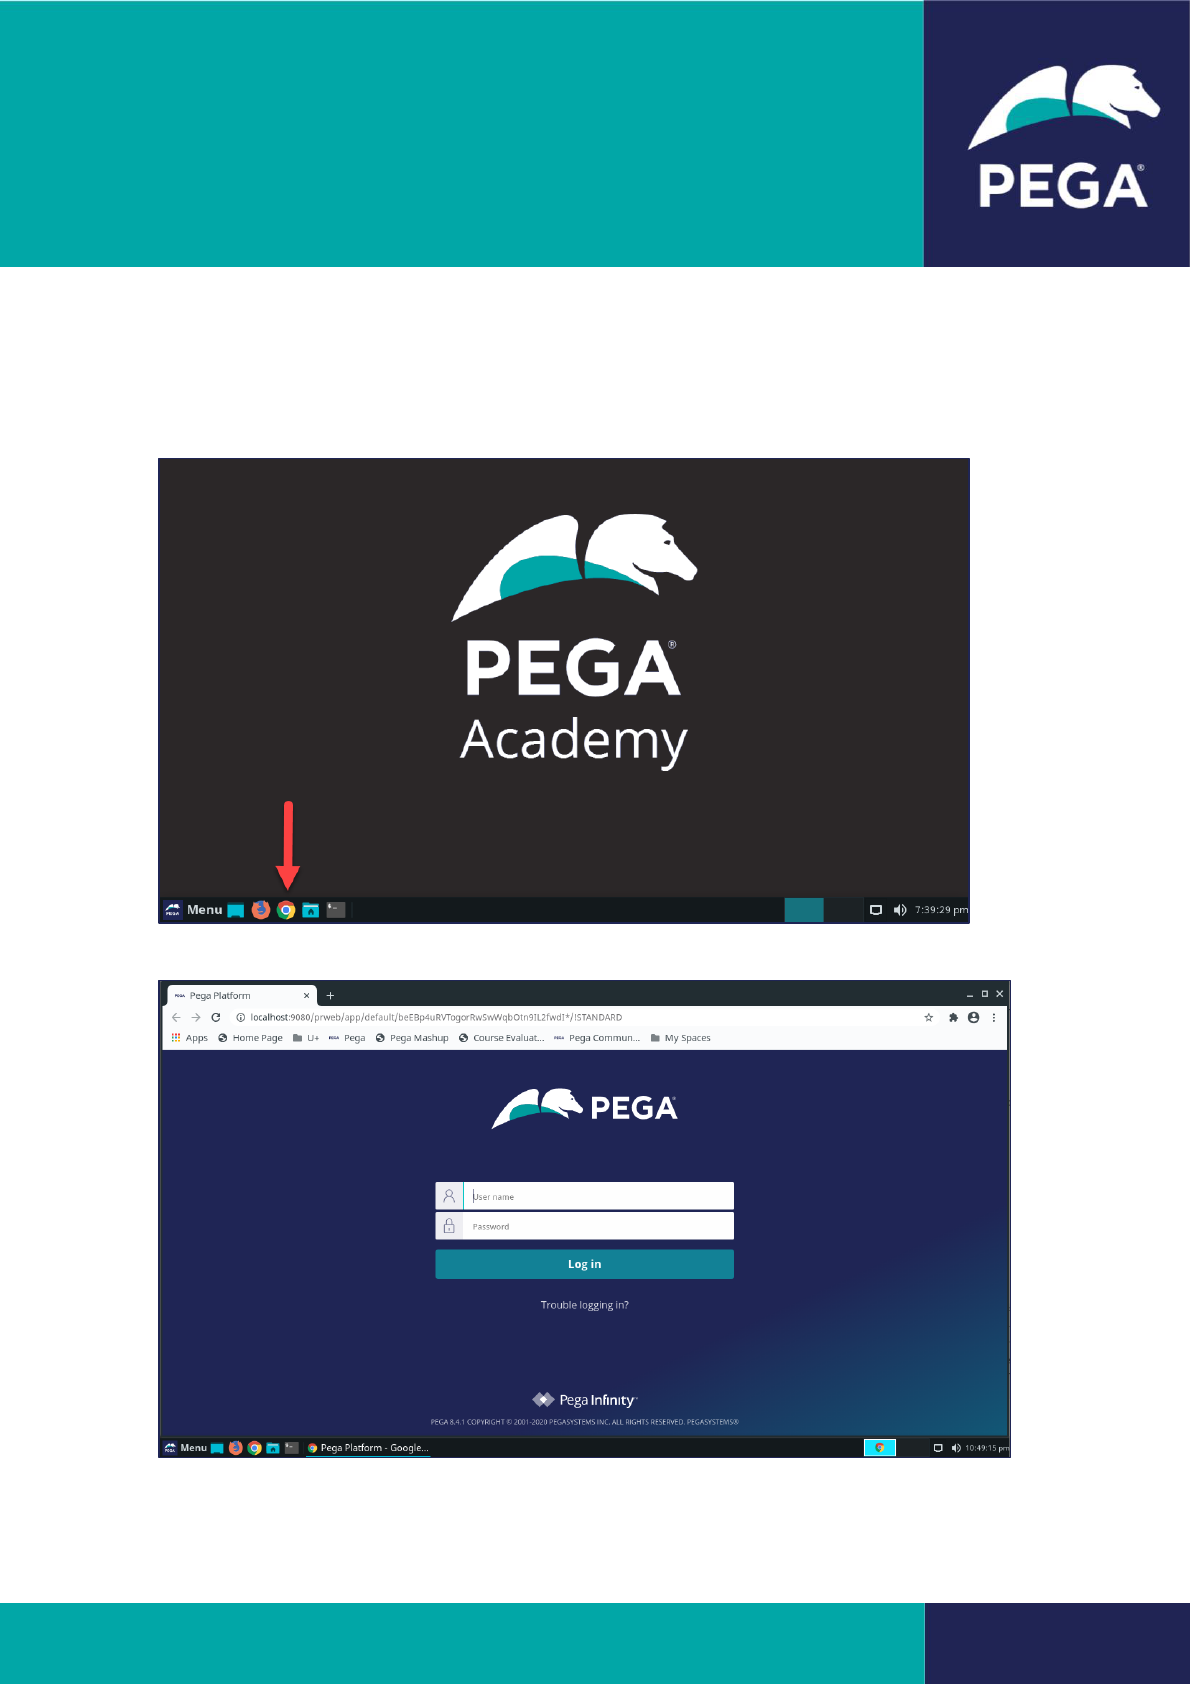
2. The VM opens the VM desktop in a new application window.
3. Wait a few minutes, then click on the browser icon to open the Pega log in page.
© 2020 Pegasystems 9
Classroom Training
Virtual Machine Guide
VMware Workstation Player
Follow these steps to run the VM using VMware Workstation Player.
Importing the VM
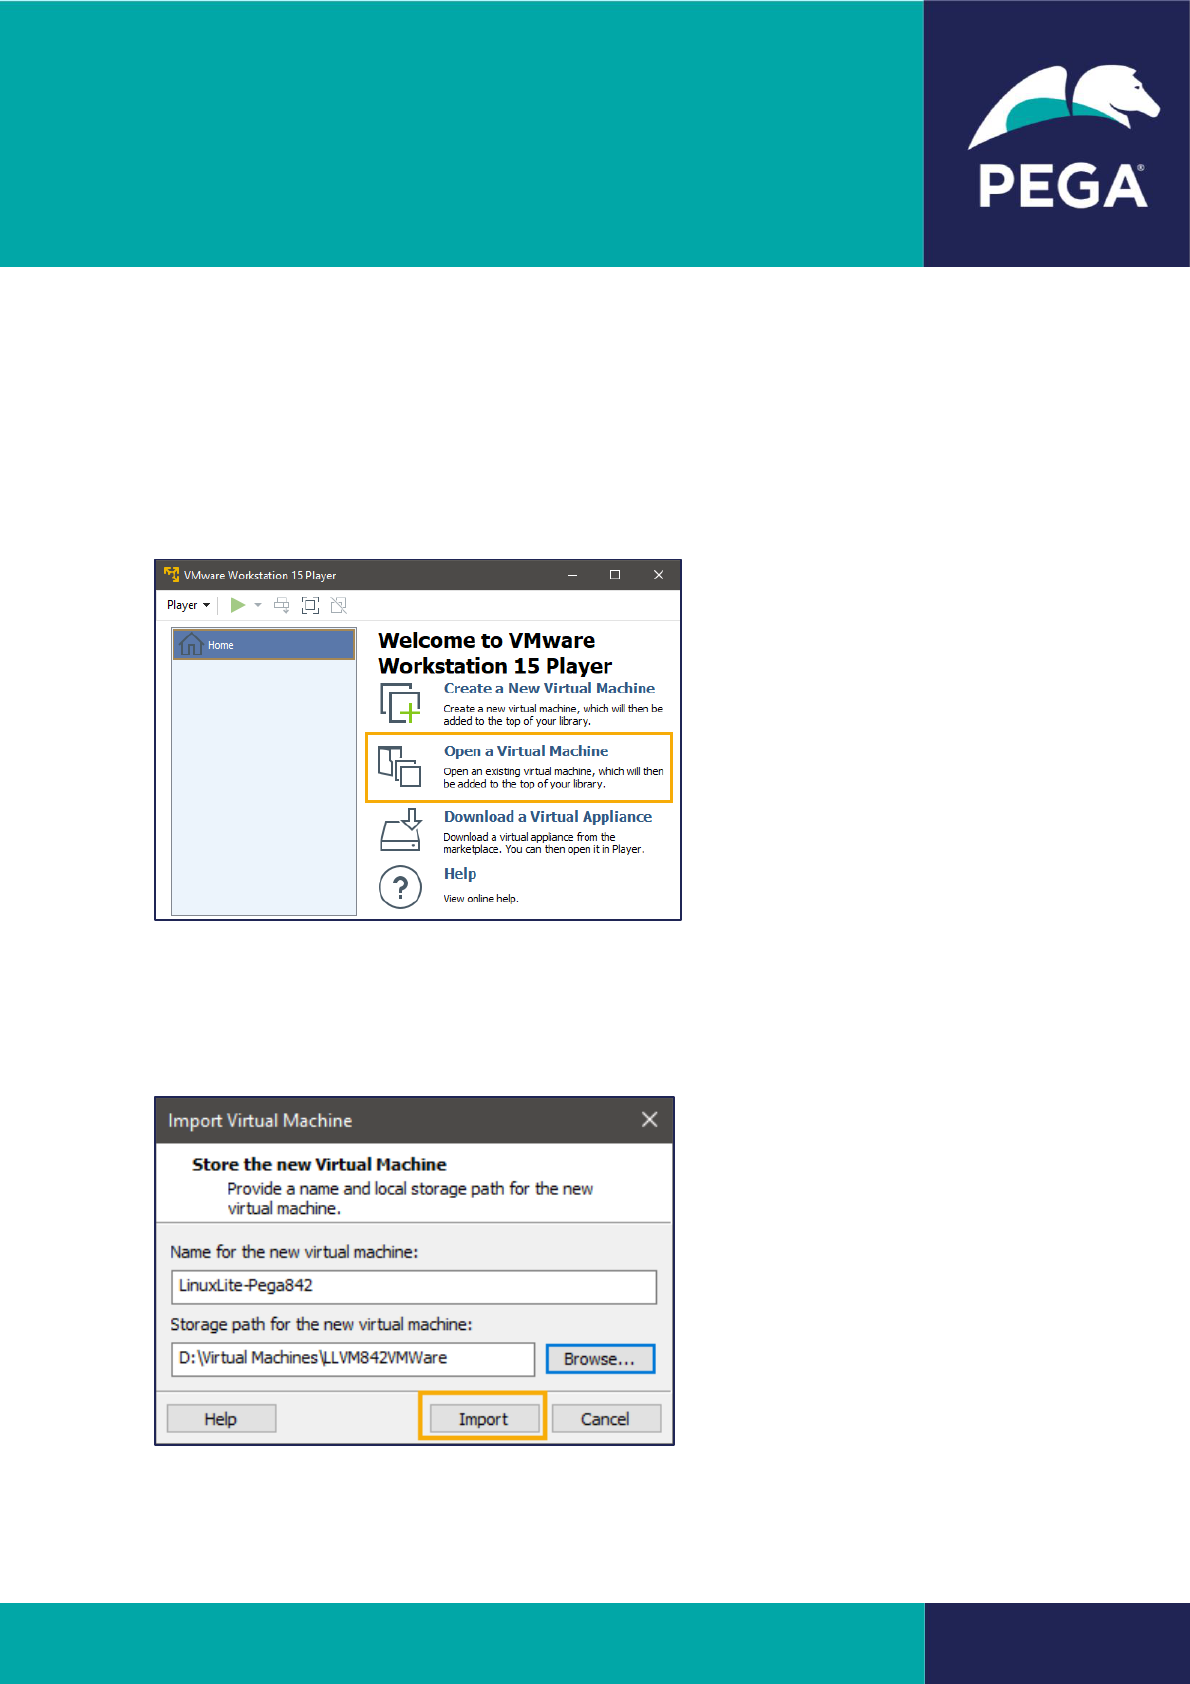
1. Launch VMWare Workstation Player
2. Click Open a Virtual Machine
3. In file explorer, select the ova file you wish to use and click Open.
4. Enter a name for the VM and choose an appropriate place on your system to store the
files in (make sure there is adequate space and choose a solid-state (SSD) drive if available
as this will dramatically improve performance).
5. Click Next.
© 2020 Pegasystems 10
Classroom Training
Virtual Machine Guide
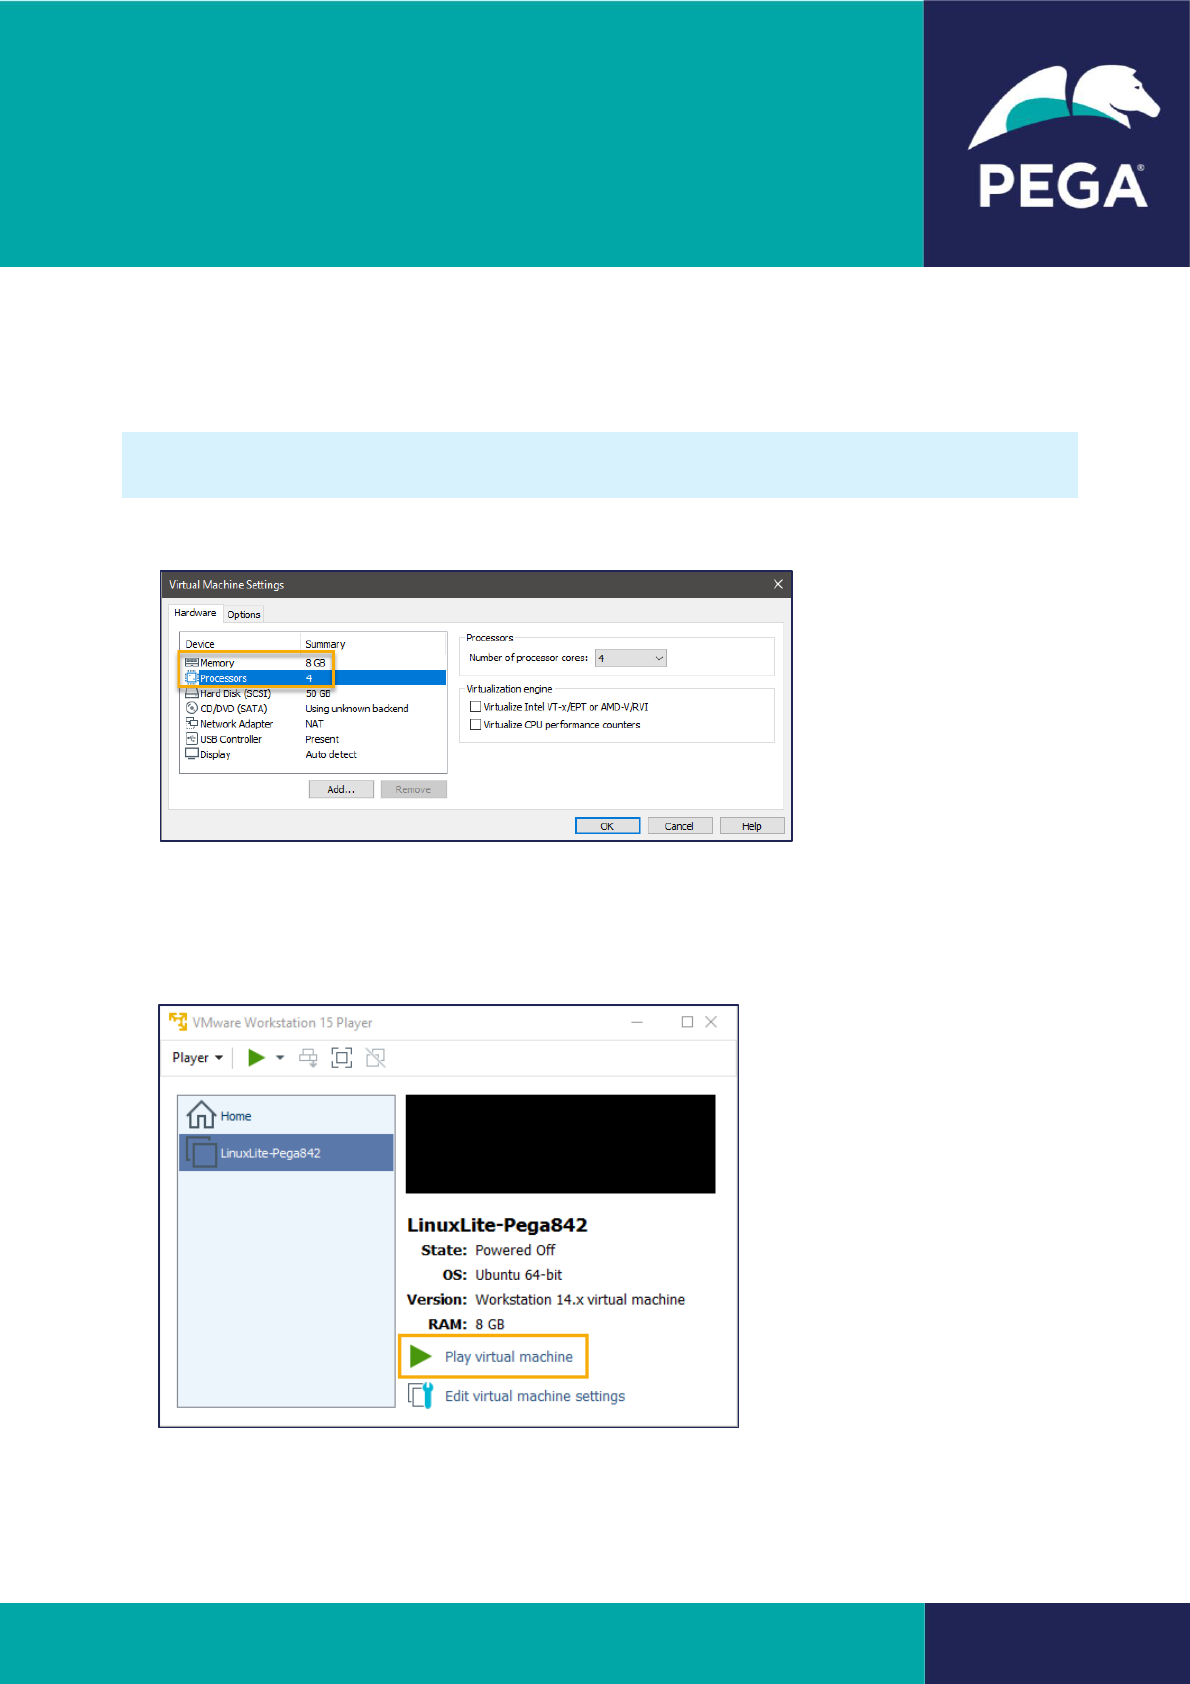
6. Click Edit virtual machine settings to modify CPU and network settings if desired. It is
recommended to set at least 2 CPU and 12 GB RAM.
The optimum student experience has been reported for the 8.5.1 and 8.5.2 images when the
settings are at 2 CPU and 16 GB RAM.
7. After modifying, the settings should look like this:
Click OK to confirm your settings.
Starting the VM
1. Make sure the VM is selected in the Library panel and click the Play virtual machine link.
© 2020 Pegasystems 11
Classroom Training
Virtual Machine Guide
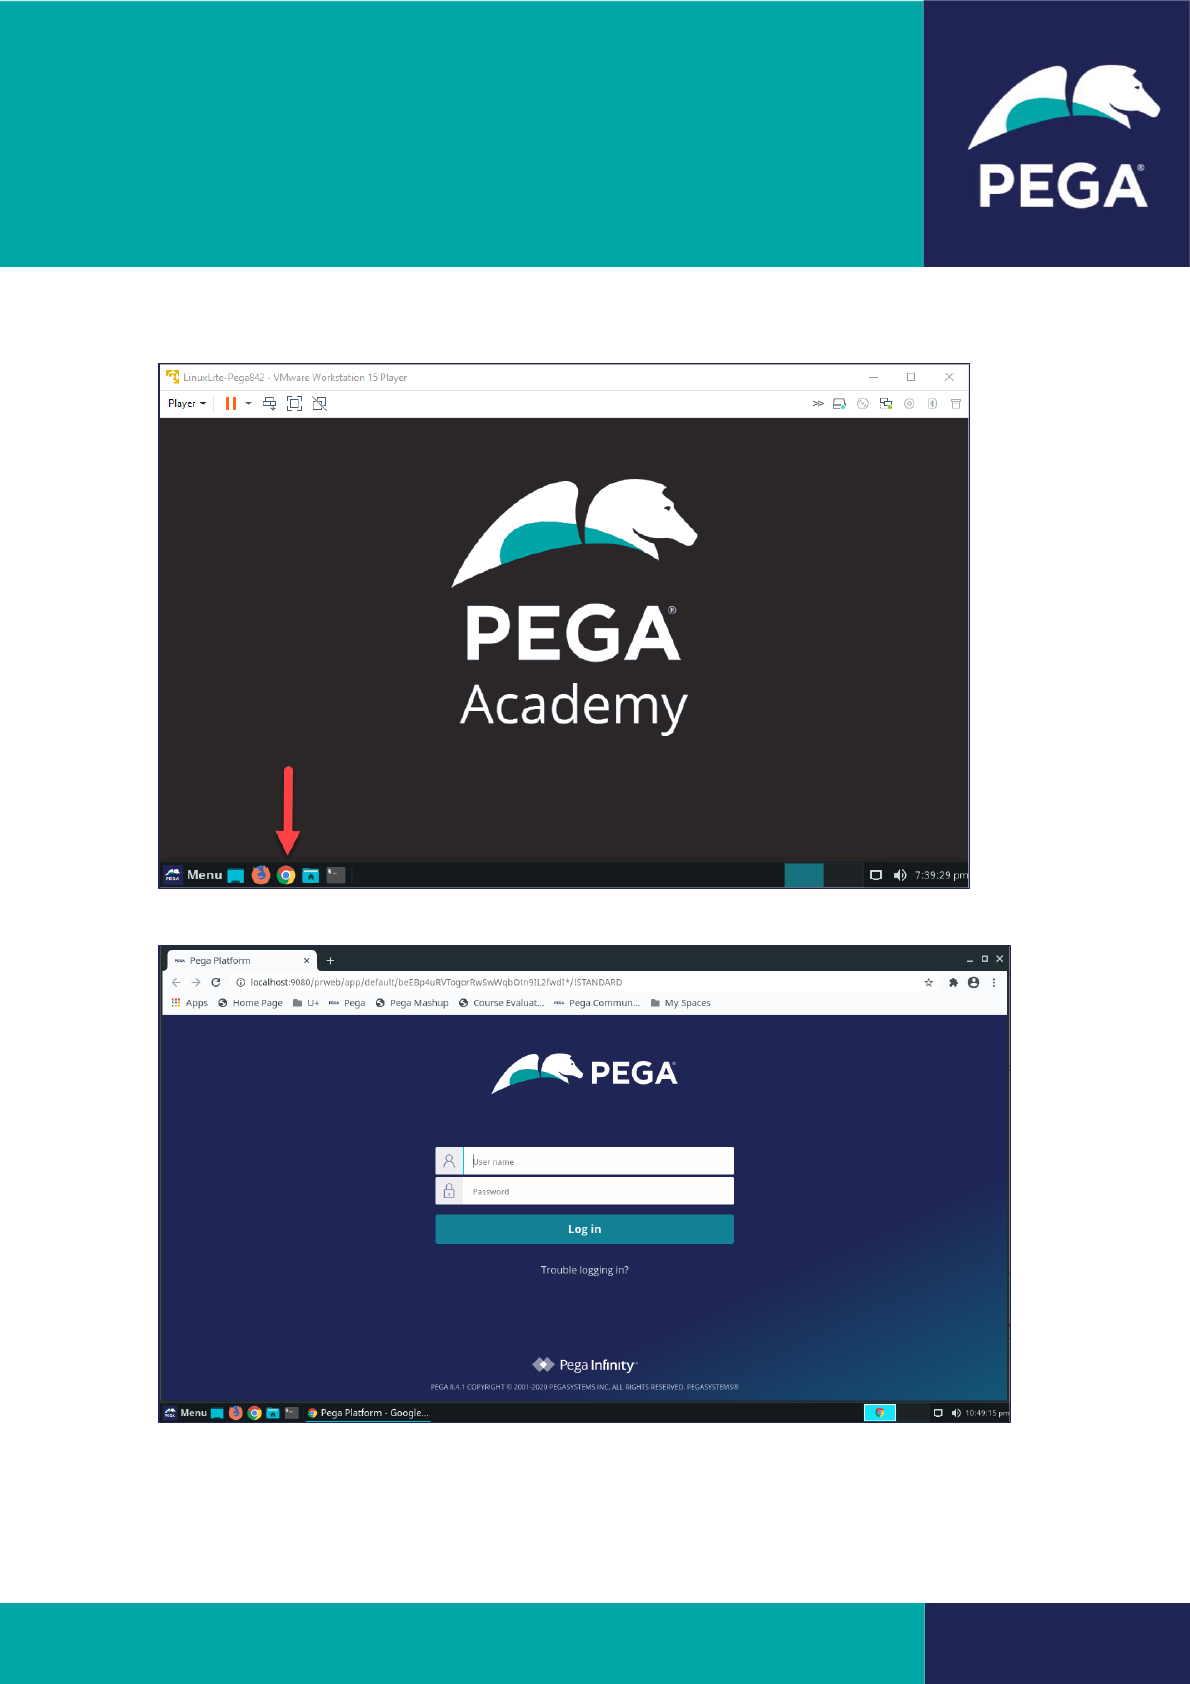
2. The VM opens the VM desktop in a new application window.
3. Wait a few minutes, then click on the browser icon to open the Pega log in page.
© 2020 Pegasystems 12
Classroom Training
Virtual Machine Guide
VMware Fusion
Follow these steps to run the VM using VMware Fusion.
1. Launch VMware Fusion.
2. From the menu bar, click File > Import.
3. Click Choose File to browse to the OVA you downloaded.
4. Select the OVA file and click Open.
5. Click Continue.
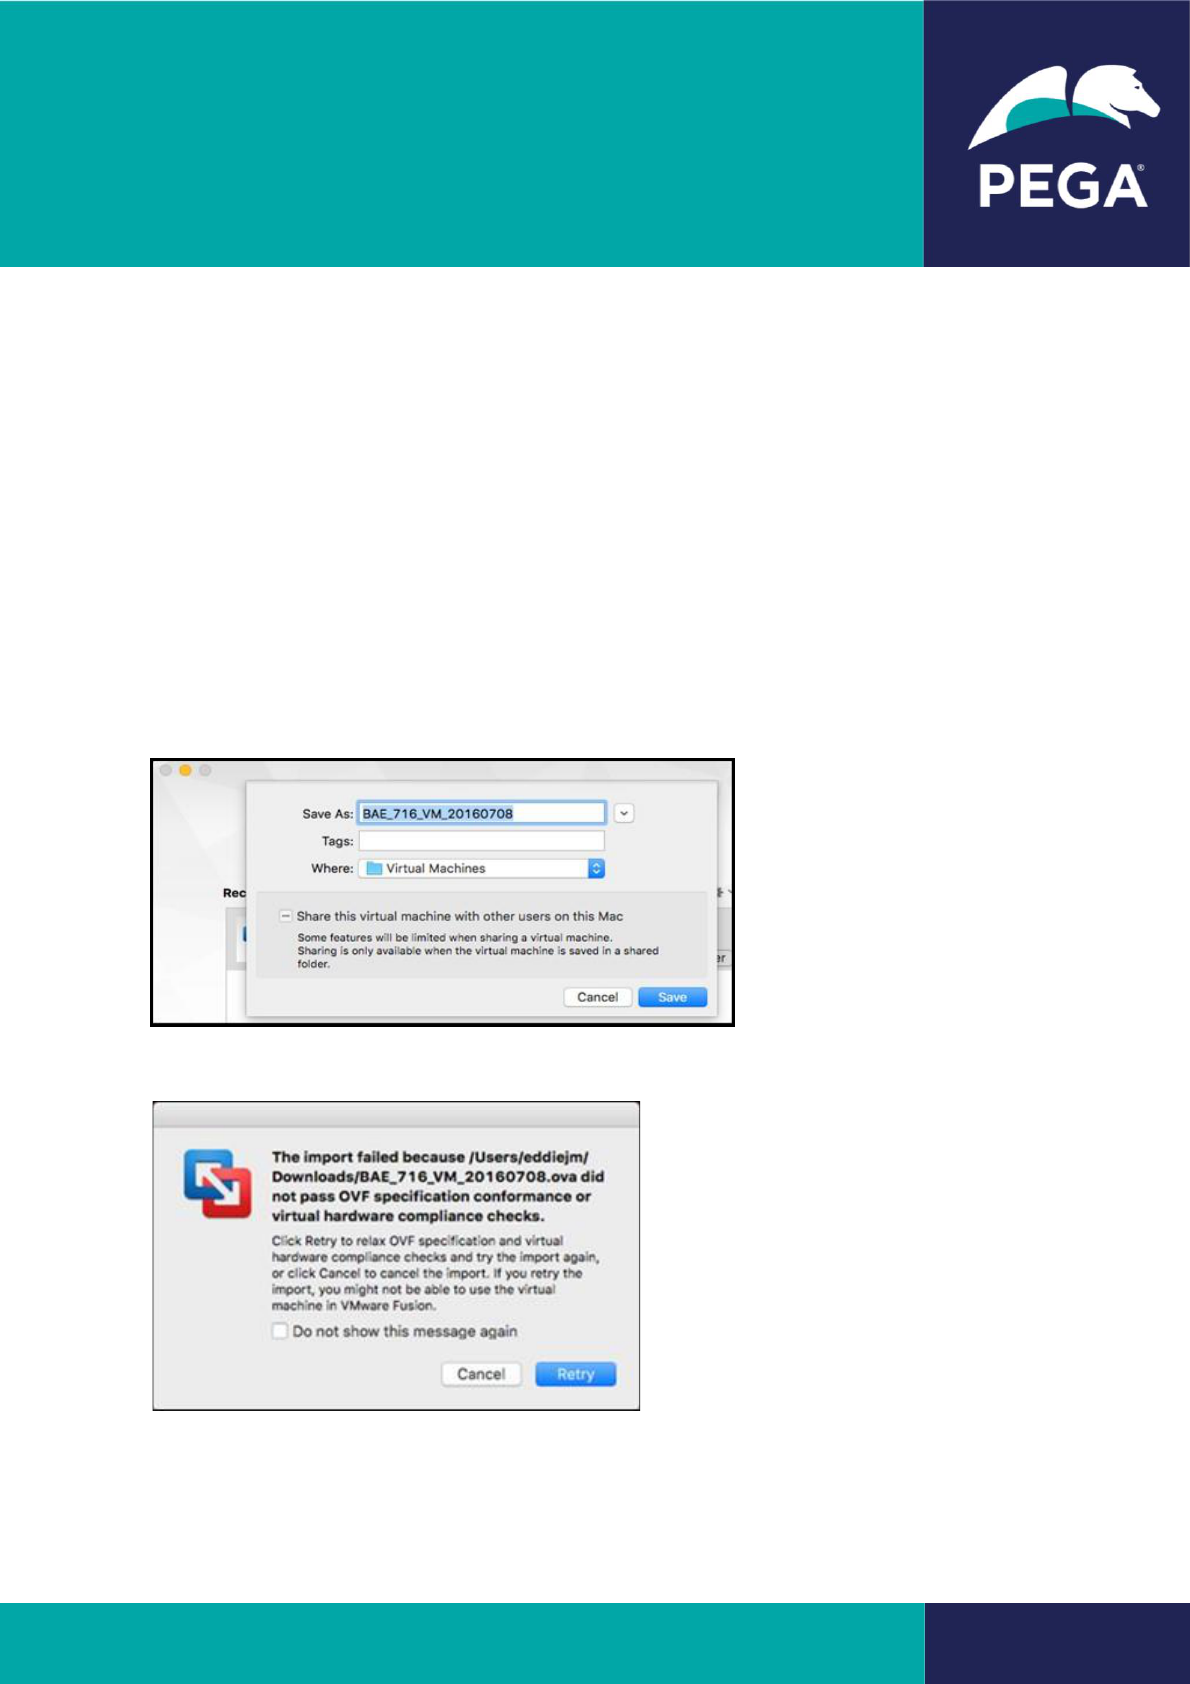
6. Change the name of the VM if desired and click Save.
7. If an “OVF specification conformance” message displays, click Retry.
8. Click Finish.
© 2020 Pegasystems 13
Classroom Training
Virtual Machine Guide
Starting the VM
1. Make sure the VM is selected and click the Run button.
2. The VM opens the VM desktop in a new application window.
3. Wait a few minutes, then click on the browser icon to open the Pega log in page.
© 2020 Pegasystems 14
Classroom Training
Virtual Machine Guide
Linux Lite Applications
Starting your browser and logging on to Pega is just the beginning with the Pega classroom
virtual machine.
You will notice that the browser is pre-configured to open Pega when you start it, using the
http://localhost:9080/prweb URL.
Bookmarks
The bookmarks toolbar also has links to other handy pages, which are explained below.
Bookmark
Description
Home Page
A landing page with tiles and menus to allow you to explore and
extend your course knowledge, as well as access VM settings and
applications (see below).
Pega (default)
The Pega Application. Login using course credentials to complete
exercises.
U+
A suite of tailored sample industry websites to support Pega web
integration exercises with an easy to configure, low-code interface.
Pega Mashup
A legacy sample website to support Pega web mashup exercises for
those with HTML coding skills.
Course Evaluation
Access to our course evaluation system.
© 2020 Pegasystems 15
Classroom Training
Virtual Machine Guide
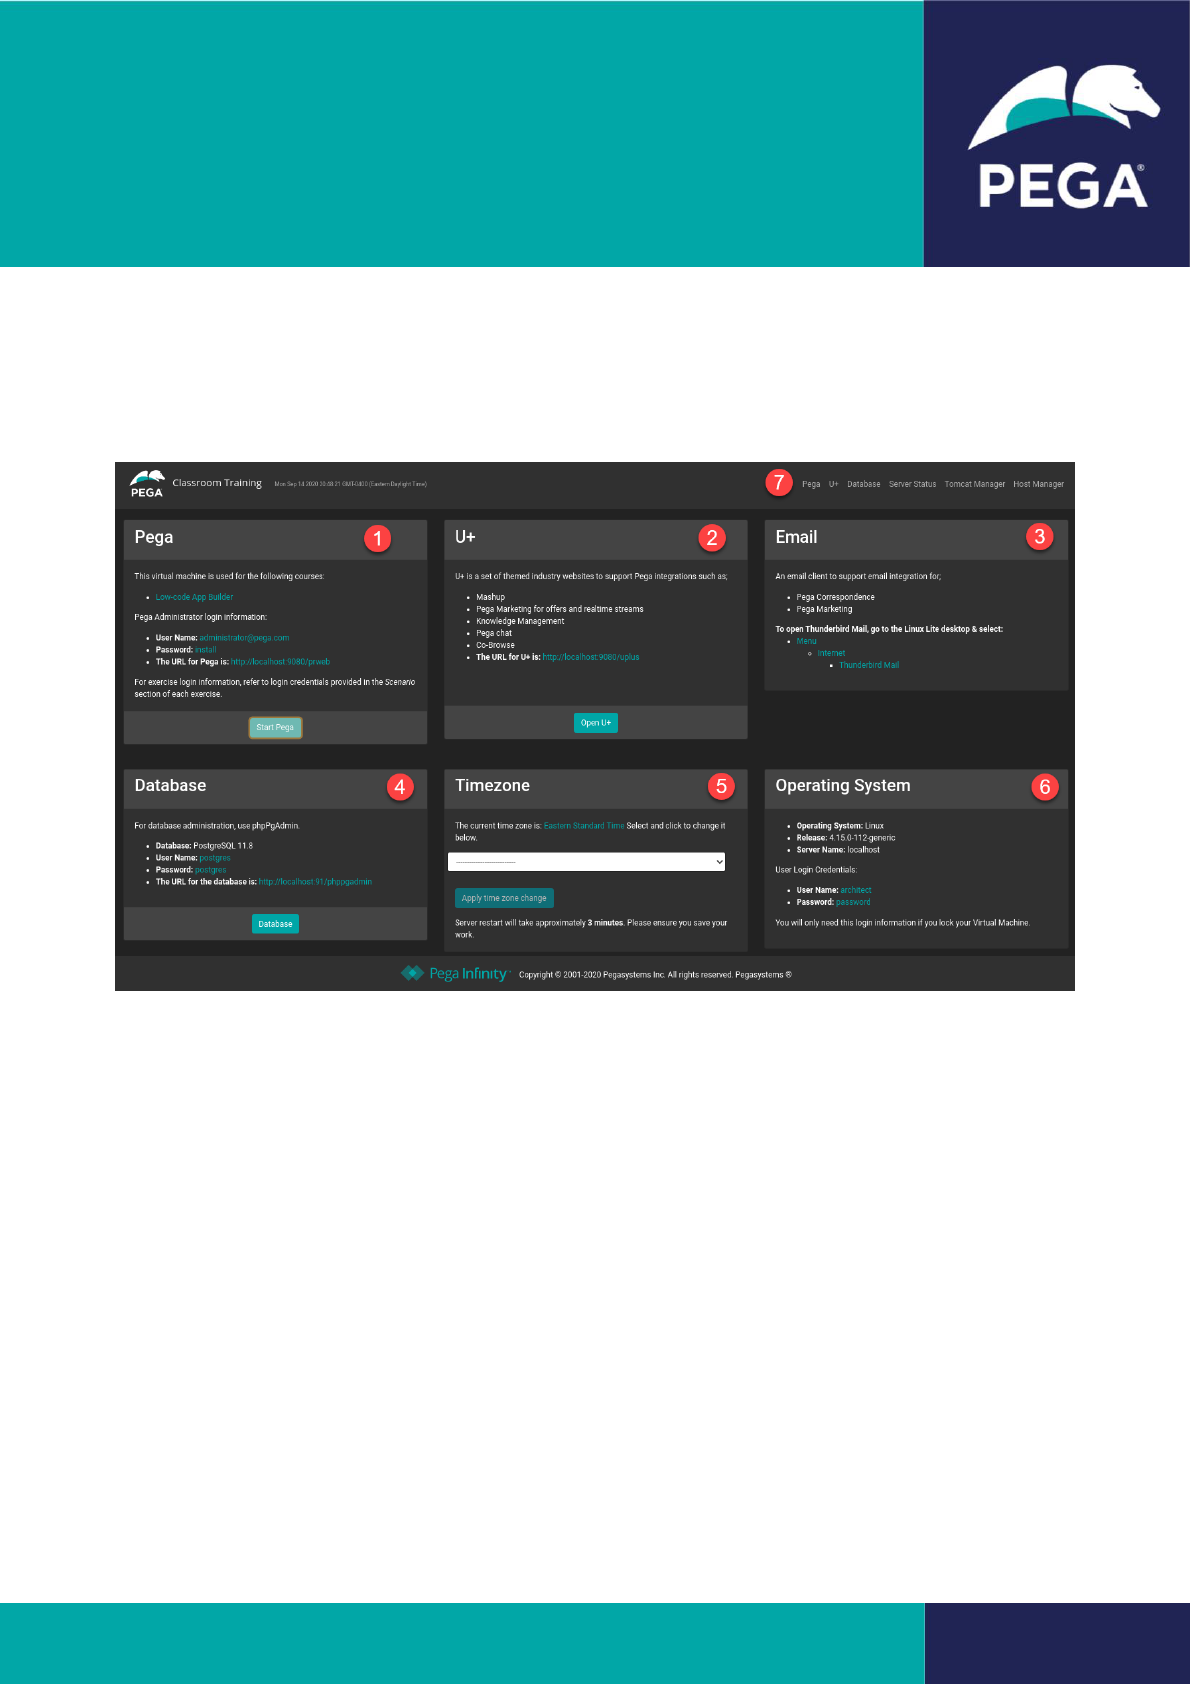
Home Page
The home page provides easy access to applications from a convenient landing page, with
links, buttons, and useful information all at a glance.
1. The Pega application with useful login and course information.
2. The U+ suite of industry websites
3. A built-in Thunderbird email client, which has been specially modified so that any emails
sent from the Pega application will be redirected to its inbox, regardless of the recipient's
email address. Ideal for testing email features! This application must be opened from the
VM desktop menu, as described.
4. Database access is provided for those who want to explore or set up additional database
assets for extended practice with data sourcing, integration, etc.
5. Timezone allows you to change the VM timezone to your local one. This is a persistent
setting and note, and it requires a restart of the VM.
6. The operating system tile provides the Linux Lite details and user credentials.
7. Links for convenience are also provided in the home page title bar.

© 2020 Pegasystems 16
Classroom Training
Virtual Machine Guide
Shutting Down the VM
Pega Academy recommends shutting down the VM when you are finished using it. Follow the
procedures for your player.
VirtualBox
1. Log out of Pega.
2. From the VirtualBox Manager, right-click on the virtual machine you want to shut down
and select Close > ACPI Shutdown.
Alternatively, from the Machine menu item, select ACPI Shutdown.
3. Click the ACPI Shutdown button to confirm the shutdown request.
VMware Workstation Player
1. Log out of Pega.
2. From the VM window, click Player > Power > Shutdown guest.
3. Click Yes to confirm you want to shut down the VM.
Note: VMware Workstation Player does not support the ACPI (Advanced Configuration and
Power Interface) specification on a guest virtual machine. You may hear that powering off
the VM corrupts the virtual machine, but this is not the case. If you have logged out of Pega,
there are no I/O (Input/Output) operations running, so there is no risk of corrupting the VM.
If you have logged out of Pega, you can safely use the Shutdown guest option in VMware
Workstation Player.
VMware Fusion
1. Log out of Pega.
2. From the menu bar, select Virtual Machine > Shut Down.
3. Click the Shut Down button to confirm the shutdown request.
© 2020 Pegasystems 17
Classroom Training
Virtual Machine Guide
Network Settings
The Pega VM is configured by default to use a NAT adapter for network access. When using
NAT networking, the VM shares the host machine’s network address. This gives the VM access
to external network resources, including your computer (the host). This setting is effective in
the majority of cases; however, if you experience problems, often this might be when using
VirtualBox in a corporate network, try changing the setting to Host-only. This limits access to
the host PC only and may resolve any issues.
Another popular setting is to select bridged networking. In this mode, the VM is a full
participant in the network and will be assigned its own unique network address just like a real
machine. This gives the VM access to other machines on the network, including your
computer (the host). The VM can be contacted by other machines on the network as if the VM
were a physical computer on the network. You can use this setting to run your VM on one PC
and access it from another, just as you would if it were running on a server.
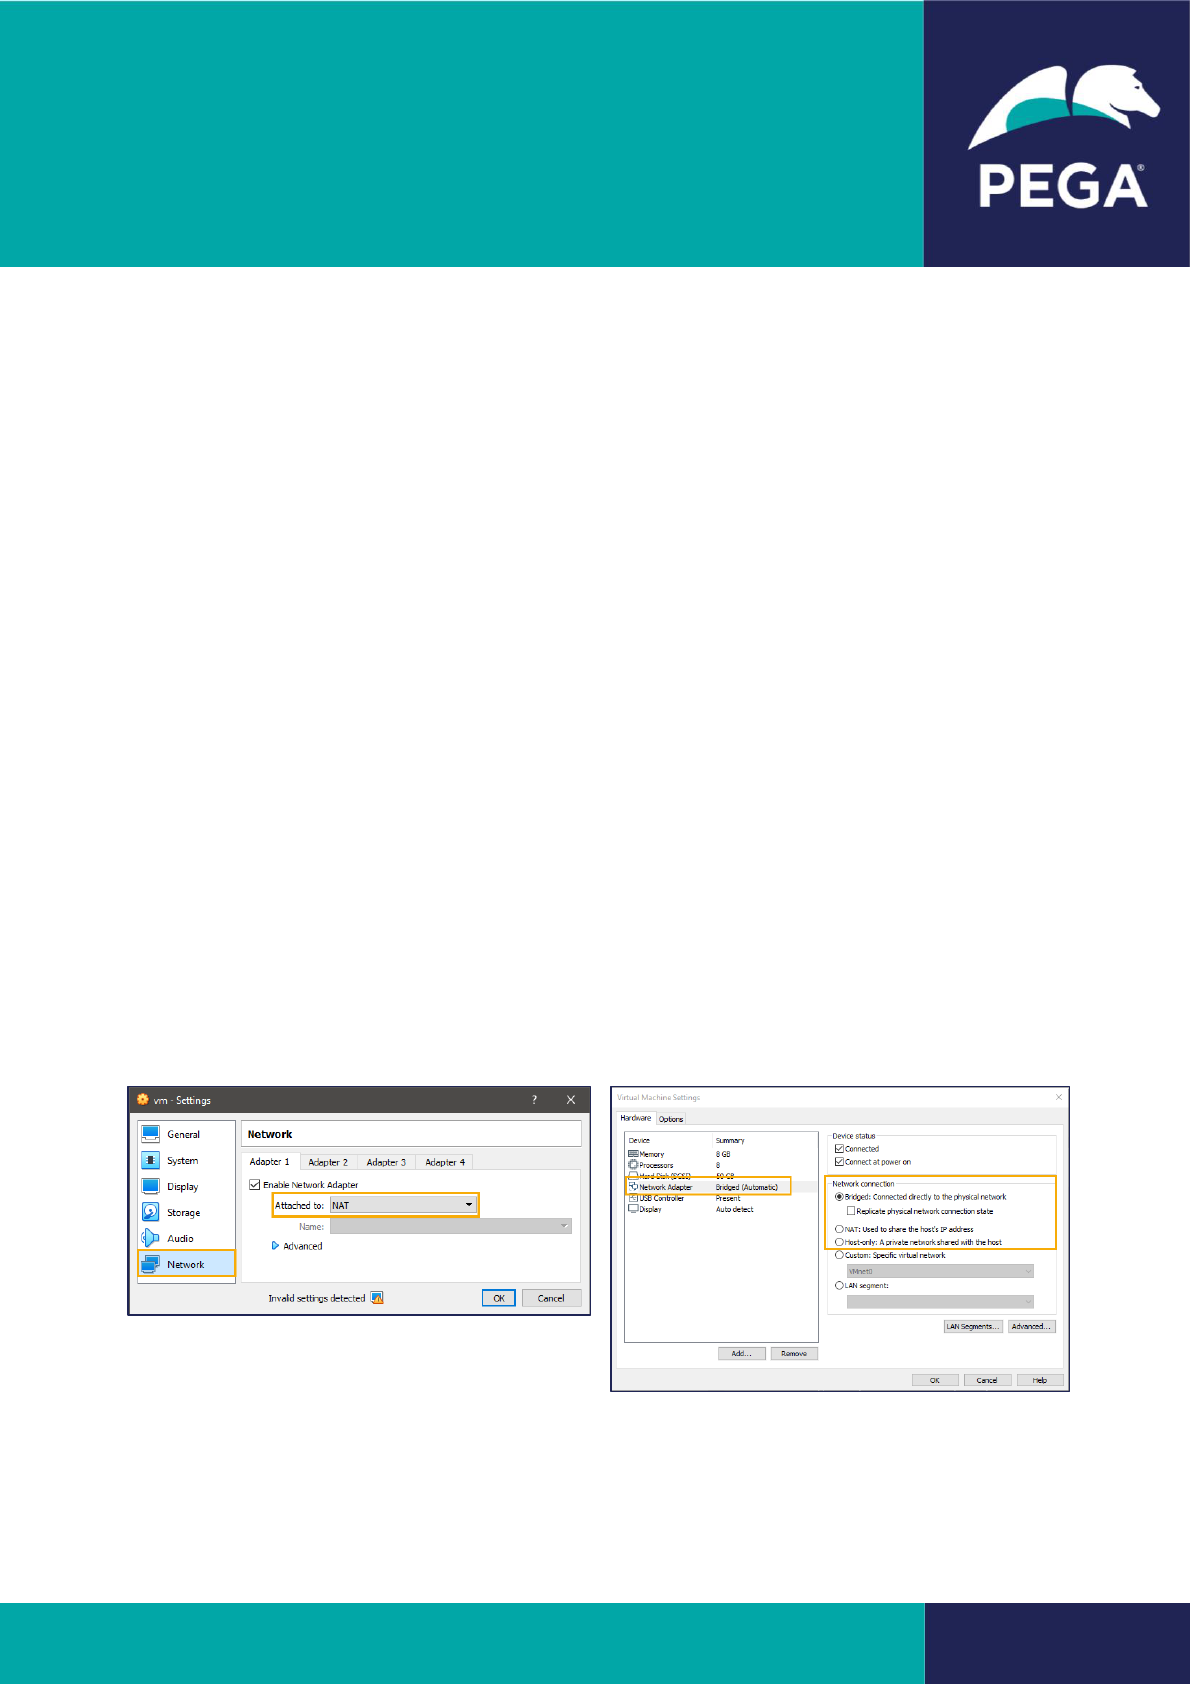
Because network adapters vary from computer to computer, an optional final step in setting
up the Pega Academy VM is to confirm the correct network adapter for your computer is
selected. After the import of the OVA is complete, follow these steps to confirm the network
adapter setting.
Refer to your VM player’s help for how to change the network connection type. They are all
similar, and you can access a settings menu to find network settings.
Figure 1: VBox
Figure 2: VMWare

© 2020 Pegasystems 18
Classroom Training
Virtual Machine Guide
If you choose bridged and wish to find out what IP address your VM is using, it can be found
in the VM as shown below:
Changing the network mode should not require any further action as the VM will reconnect
automatically. However, if for any reason it does not, you can manually disconnect and
reconnect it using the menu as seen above.
Note: The IP address shown in the image above is an example only. The IP address
displayed in your system will most likely be different and is the one you should use.
© 2020 Pegasystems 19
Classroom Training
Virtual Machine Guide
Getting Help
Each virtual machine player’s features vary, but generally, they perform similar functions, and
there is a wealth of readily available help on the vendor’s websites, forums, and internet in
general. As the saying goes, ‘if in doubt, Google it.’ Below are some useful links.
VBox
https://www.virtualbox.org/manual/
VMWare Player
https://www.vmware.com/support/pubs/player_pubs.html
VMWare Fusion
https://www.vmware.com/au/support/fusion.html
Please refer to the vendor help and support for the respective players. For assistance with the
Pega classroom content, i.e., course and the Pega applications inside the VM, contact your
course instructor or education@pega.com.
